Fizzing Fun: Crafting Bath Bombs with Simple Ingredients
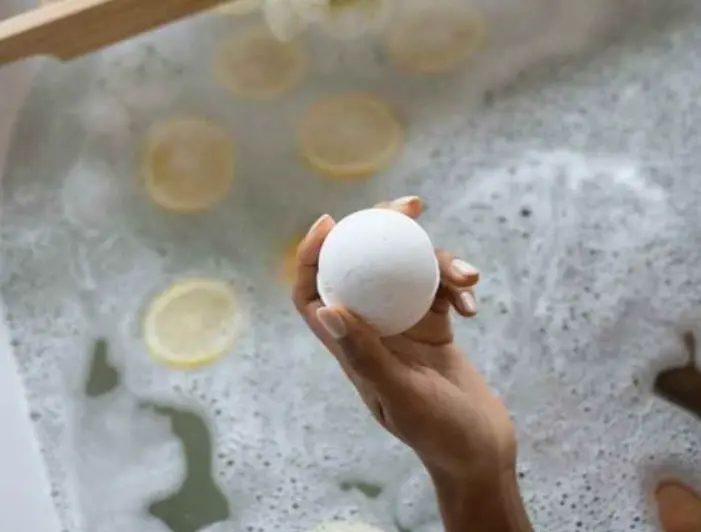
Today, we’ll be diving into the world of bath bombs, those fizzy little wonders that transform your bathtub into a whirlpool of fragrance, color, and pure bliss.
As someone who loves pampering herself (and let’s be honest, who doesn’t?), I’ve spent countless hours experimenting with different bath bomb recipes. And you know what? I’ve realized that you don’t need fancy, complicated ingredients to create these fizzy delights. In fact, some of the best bath bombs I’ve ever made have been crafted with simple, affordable ingredients that you might already have in your kitchen.
So, grab your aprons, my darlings, and let’s get started on a journey of fizzing fun!
The Beauty of Simplicity
One of the things I love most about making bath bombs is the sheer simplicity of the process. With just a few basic ingredients, you can create a luxurious treat that will leave your skin feeling silky smooth and your senses indulged.
The primary components of a bath bomb are baking soda, citric acid, and a moisturizing oil. These three ingredients work together to create the iconic fizzing reaction and nourish your skin at the same time. Isn’t that just magical?
Of course, you can always add extra goodies like essential oils, dried flowers, or colorants to personalize your bath bombs and create a truly unique experience. But the beauty lies in the fact that even without these extras, you can still enjoy a fantastic, fizzy soak.
Easy Peasy Bath Bomb Recipe
Now, let’s get down to business, shall we? Here’s a simple, foolproof recipe that I’ve been using for years. It’s perfect for beginners and seasoned bath bomb makers alike.
Ingredients:
- 1 cup baking soda
- 1/2 cup citric acid
- 1/2 cup cornstarch
- 1/2 cup Epsom salts
- 2 tablespoons melted coconut oil (or any carrier oil of your choice)
- 10-15 drops of essential oil (optional)
- Food coloring (optional)
Instructions:
- In a large bowl, whisk together the baking soda, citric acid, cornstarch, and Epsom salts.
- In a separate bowl, mix the melted coconut oil and essential oil (if using).
- Slowlypour the liquid mixture into the dry ingredients, stirring constantly with a fork or whisk. The mixture should resemble damp sand.
- If you’re using food coloring, add it to the mixture and stir well until you achieve your desired color.
- Firmly pack the mixture into bath bomb molds, pressing down to remove any air pockets.
- Allow the bath bombs to dry for at least 24 hours before gently removing them from the molds.
- Store your bath bombs in an airtight container until ready to use.
That’s it, my lovelies! With just a few simple steps, you’ve created a batch of luxurious bath bombs that will transport you to a world of relaxation and indulgence.
Personalizing Your Bath Bombs
One of the best things about making your own bath bombs is the ability to customize them to your liking. Here are a few ideas to get you started:
- Essential Oils: Experiment with different essential oil combinations to create your desired scent. Lavender and chamomile are great for relaxation, while citrus oils like lemon or grapefruit can energize and uplift.
- Dried Flowers: Add a sprinkle of dried rose petals, lavender buds, or chamomile flowers for a touch of natural beauty and fragrance.
- Colorants: Food coloring or mica powders can be used to create vibrant, eye-catching bath bombs. Just be mindful of the amount you use, as too much can affect the fizzing reaction.
- Exfoliants: Add a tablespoon or two of finely ground oats, coffee grounds, or sugar to your mixture for a gentle exfoliating effect.
The possibilities are endless, my dears! Don’t be afraid to get creative and make these bath bombs truly your own.
Sharing the Fizzy Love
Now, let’s take a moment to appreciate the wisdom and experiences shared by some of our fellow bath bomb enthusiasts on Reddit. Their insights and tips are sure to inspire and guide you on your bath bomb-making journey.
u/BathBombQueen shared their secret to achieving the perfect fizz:
“The key is to use high-quality ingredients and get the ratios just right. I’ve found that a 2:1 ratio of baking soda to citric acid works wonders for a long-lasting, bubbly fizz.”
u/FizzMaster had some great advice for those struggling with crumbly bath bombs:
“If your bath bombs are crumbling, try adding a bit more oil or witch hazel to the mixture. The right amount of moisture is crucial for binding everything together.”
And u/SpaLover reminded us of the importance of proper storage:
“Store your bath bombs in an airtight container, away from moisture and direct sunlight. This will help them retain their shape, scent, and fizzy power for months to come.”
Aren’t these fellow bath bomb enthusiasts just wonderful? Their passion and expertise are truly inspiring, and I’m grateful for the opportunity to learn from them.
A Word of Caution
Now, as much as I love bath bombs, there are a few things to keep in mind to ensure a safe and enjoyable experience. First and foremost, always do a patch test before using any new ingredients, especially if you have sensitive skin or allergies.
Secondly, while bath bombs can be a lot of fun, moderation is key. Using too many bath bombs or soaking for extended periods can disrupt your skin’s natural pH balance and cause dryness or irritation.
Lastly, be mindful of the ingredients you use. While baking soda, citric acid, and most essential oils are generally safe, some colorants or additives may not be suitable for everyone. Always do your research and err on the side of caution.
Fizzy Fun for Everyone
One of the best things about bath bombs is that they’re suitable for people of all ages. Whether you’re a busy mom looking for a relaxing moment, a teenager in need of some self-care, or a grandparent seeking a soothing soak, bath bombs can provide a delightful escape.
And you know what? Making bath bombs can be a wonderful family activity too! Gather your loved ones, whip up a batch of these fizzy delights, and enjoy some quality time together while creating something special.
As u/FamilyFizz shared on Reddit:
“Making bath bombs has become a cherished tradition in our household. My kids love picking out the scents and colors, and we all have a blast creating these little fizzy wonders together.”
Isn’t that just heartwarming? Bath bombs truly have the power to bring people together and create lasting memories.
Frequently Asked Questions
Before we wrap up, let’s address some frequently asked questions about bath bomb-making. These answers are based on my personal experiences and the collective wisdom of our fellow bath bomb enthusiasts.
Q1: Can I use regular table salt instead of Epsom salts?
While you can certainly use table salt in a pinch, Epsom salts are preferred for their added skin-nourishing benefits. They’re rich in magnesium, which can help soothe sore muscles and promote relaxation.
Sure, let’s continue with the FAQ section:
Q2: Is it safe to use food coloring in bath bombs?
Food coloring is generally safe to use in bath bombs, but it’s best to opt for natural, plant-based colorants whenever possible. These are less likely to cause skin irritation or stain your bathtub. Some great natural options include beetroot powder, turmeric, and matcha green tea powder.
Q3: How long do homemade bath bombs last?
Homemade bath bombs can last for several months if stored properly. Keep them in an airtight container, away from moisture and direct sunlight, and they should retain their shape, scent, and fizzy power for a long time. As a general rule, it’s best to use them within 6 months for the best experience.
Q4: Can I add oils or butters to my bath bombs?
Absolutely! Adding a bit of shea butter, cocoa butter, or even coconut oil can enhance the moisturizing properties of your bath bombs. Just be mindful of the amount you use, as too much can affect the fizzing reaction or cause the bath bombs to become too soft or oily.
Q5: How can I prevent my bath bombs from cracking or crumbling?
There are a few tricks to help prevent cracking and crumbling:
- Use a high-quality baking soda and citric acid. Cheaper brands may contain additives that can affect the stability of your bath bombs.
- Add a small amount of kaolin clay or arrowroot powderto the mixture. These help absorb excess moisture and bind the ingredients together.
- Pack the mixture firmly into the molds, eliminating any air pockets that could cause cracking.
- Allow the bath bombs to dry completely before removing them from the molds. Patience is key here!
Fizzy Farewell
Well, my darlings, I think we’ve covered just about everything there is to know about crafting bath bombs with simple ingredients. From easy recipes to personalizing your creations, and even addressing common concerns, we’ve delved deep into the world of fizzy fun.
As we bid farewell, I want to leave you with a final thought: never underestimate the power of a simple bath bomb. These little wonders may be humble in their ingredients, but they hold the potential to transform an ordinary bath into a luxurious, rejuvenating experience.
So go forth, my loves, and embrace the joy of bath bomb-making. Experiment, create, and revel in the fizzy goodness. And remember, whether you’re treating yourself or sharing the love with others, each bath bomb you craft is a little piece of self-care and indulgence.
Until next time, keep fizzing and keep smiling!
Ana is the founder of Vogue Vibrance, an imaginative hair inspiration blog that covers vibrant colors, textures, updos, and other eye-catching styles. She launched it as a digital space for hair creativity and self-expression to thrive. Through trending looks and conversations, Vogue Vibrance empowers readers to embrace hair as a tool for confidence and self-expression.